But as that silly movie, Meet the Robinsons teaches all the little childrens, we must always "Move Forward" and that is what I guess I've done through the years. Either that, or I've stayed addicted to making things because it makes me feel satisified when I'm all finished. It's like cleaning a tile bathroom (not a fiberglass one, I'll blog about that later); once it's all done and gleaming beautifully, you get this overwhelming thrill of "Wow, I just did something awesome!" And then the rest of the day doesn't feel like such a waste when I sit and watch Star Wars (who am I kidding, it's probably Dora) for hours on end.
 That's what crafting does for me. So I'm sharing a couple of my simple craft ideas that saved me from spending money and time to do something I needed to do.
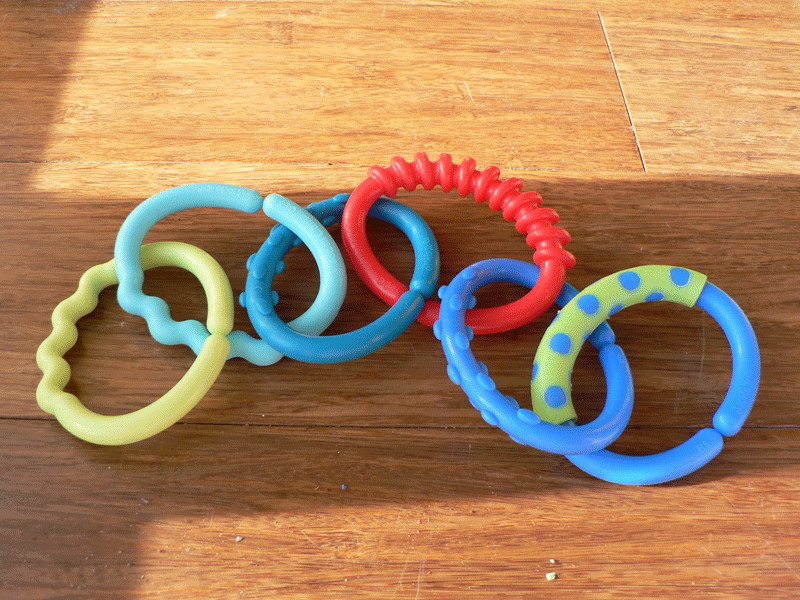
For example, when I was pregnant, I got a ton of these beautiful plastic links - I love these things and used them a bunch when Jenny was little. But once she grew up and stopped chewing on everything, I didn't really use them much anymore. I didn't want to get rid of them, because I love these little things, so I decided to put them to good use. I used them as tie back for the curtain in her room. Tah-Duh!

It was cheap because I already had a ton of these rings and it was easy because all I needed to do to attach them to the wall was use one of those little picture hooks that comes in the picture hanging kit I get every so often for Christmas.
By the way, you can NEVER have enough of those little kits. They make for great helpers when you're doing crafts. All those little nails and tacks and the wire for hanging it all together makes for great other projects and . . . I digress.
Now this method of tie-back allows me to do that theatrical style "poofing" of the curtains. It looks awesome in her room.

Having this success, I decided to do something a bit different for another set of Jenny's curtains. I have these letter links. They are perfect for tracing on Jenny's Magna-Doodle and they make great curtain tie backs too.
Now with these, I had to do something a little different. I have this beautiful ribbon that was on one of Jenny's gifts - it's the really cute yellow ribbom with white polka-dots and I never knew what to do with it. I had saved it because it was so cute, but I didn't want to just put it into her baby book and then one day go, "Uh, I just really liked this ribbon; that's why I saved it". For some reason, that would've been silly or something.
First I took the ribbon and made sure to measure it even for both curtains on the window.
Then I picked letters that had 2 flat edges to them. Originally, I wanted to do Jenny's J, but it made for a terrible tie back because I couldn't attach it to the hook well. The H and W worked the best, but I also used an E and an M and they worked too.
Then I looped the ribbon through the flat part of the lettter and stitched it to close the loop.
Lastly I repeated the process with a second letter on the other end of the ribbon. Both letters hang on the hook.
So a little trimming and a couple stitches later and voila! curtain tie backs!

So I'm sharing two of my successes because they make me proud of myself - a great feeling. And I didn't even have to clean a bathroom to get there!


