Showing posts with label Pinterest. Show all posts

Sunday, July 8, 2012

Pinterest, Pin ME!

There are moments in my life when I actually do something really stupid that turns out to be really cool. I figure it stems from that first summer when lack of a job trapped me in the itty-bitty apartment watching HGTV for hours. That was the year I recovered our stool using an old pair of my jeans - not my finest craft project. And over the years I've had numerous failures: the year I tried to attach a random piece of fleece to the bottom of a sweatshirt to make it longer, the one Valentine's when I used a jello mould to bake a heart shaped cake and it over-flowed, or the quilt patches I still haven't put together.

But as that silly movie, Meet the Robinsons teaches all the little childrens, we must always "Move Forward" and that is what I guess I've done through the years. Either that, or I've stayed addicted to making things because it makes me feel satisified when I'm all finished. It's like cleaning a tile bathroom (not a fiberglass one, I'll blog about that later); once it's all done and gleaming beautifully, you get this overwhelming thrill of "Wow, I just did something awesome!" And then the rest of the day doesn't feel like such a waste when I sit and watch Star Wars (who am I kidding, it's probably Dora) for hours on end.
That's what crafting does for me. So I'm sharing a couple of my simple craft ideas that saved me from spending money and time to do something I needed to do.

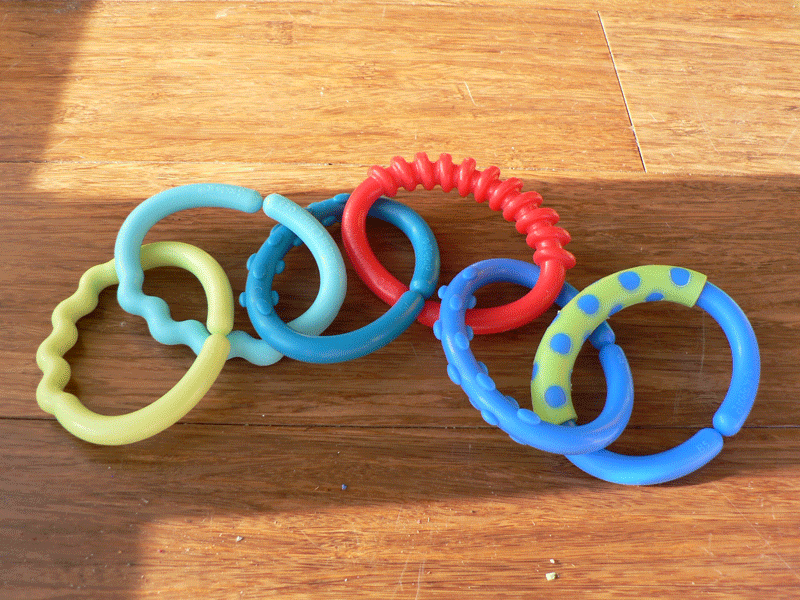
For example, when I was pregnant, I got a ton of these beautiful plastic links - I love these things and used them a bunch when Jenny was little. But once she grew up and stopped chewing on everything, I didn't really use them much anymore. I didn't want to get rid of them,  because I love these little things, so I decided to put them to good use. I used them as tie back for the curtain in her room. Tah-Duh!


It was cheap because I already had a ton of these rings and it was easy because all I needed to do to attach them to the wall was use one of those little picture hooks that comes in the picture hanging kit I get every so often for Christmas.

By the way, you can NEVER have enough of those little kits. They make for great helpers when you're doing crafts. All those little nails and tacks and the wire for hanging it all together makes for great other projects and . . . I digress.

Now this method of tie-back allows me to do that theatrical style "poofing" of the curtains. It looks awesome in her room.

Having this success, I decided to do something a bit different for another set of Jenny's curtains. I have these letter links. They are perfect for tracing on Jenny's Magna-Doodle and they make great curtain tie backs too.

Now with these, I had to do something a little different. I have this beautiful ribbon that was on one of Jenny's gifts - it's the really cute yellow ribbom with white polka-dots and I never knew what to do with it. I had saved it because it was so cute, but I didn't want to just put it into her baby book and then one day go, "Uh, I just really liked this ribbon; that's why I saved it". For some reason, that would've been silly or something.

First I took the ribbon and made sure to measure it even for both curtains on the window.
Then I picked letters that had 2 flat edges to them. Originally, I wanted to do Jenny's J, but it made for a terrible tie back because I couldn't attach it to the hook well. The H and W worked the best, but I also used an E and an M and they worked too.
Then I looped the ribbon through the flat part of the lettter and stitched it to close the loop.
Lastly I repeated the process with a second letter on the other end of the ribbon. Both letters hang on the hook.

So a little trimming and a couple stitches later and voila! curtain tie backs!


So I'm sharing two of my successes because they make me proud of myself - a great feeling.  And I didn't even have to clean a bathroom to get there!

Sunday, July 1, 2012

Pinterest Conquests: Kid Art

Toddler Scribble ArtSo I saw something on Pinterest the other day about taking your child's scribble art and turning it into actual living room art.  Notice how this Pinner cut out similar shapes to make up a flower patter of sorts and then probably Mod-Podged it onto a spraypainted canvas.

Good for this Pinner - I'm just not talented or patient enough to figure out how to do her pattern - the shapes are somewhat repetitive, but then they change size and how the heck did this woman find time to spraypaint a canvas and Mod-Podge all those pieces when she probably has a two year old screaming at her for more Fruit-Snacks.

Okay, maybe that's just me. Anyway I digress . . .


Well, I thought, I can certainly do a better job than that. Jenny has been doing all this Color Wonder painting and it's beautiful in places. I figured I could take Jenny's paintings and turn them into art.

I took down an old black, plastic frame that we'd bought to put my brother's poker photo in. (Sorry Aaron, it was a stealing bingo present and it just didn't fit in my bedroom. I still have it for Tim's man cave in the next house. Don't worry.)

Then I took a plain piece of black posterboard - very cheap.


I cut out pieces in a 3X3 square and arranged them on the black posterboard. I used double stick tape (not Mod-Podge) to attach them to the posterboard. I taped everything to the cheap white paper matte that comes with the plastic black frame and voila! art for my bedroom.

Now I'm fairly certain that someone is going to point out that the middle "tile" in the second row is off a bit.

I had a toddler demanding fruit snacks at that moment and didn't pay attention so much to where I was sticking down that particular piece.

Oh well. I still think it's beautiful. And it looks beautiful hanging in my bedroom. And no one knows that it's really just Jenny's ColorWonder paintings cut into pieces.

Love it!

Sunday, April 29, 2012

Pinterest Conquest #2

Spring Break brought Jenny and me a ton of time with nothing to do. The zoo was great and we had a blast, but it rained several times while we were off school. So I sought out Pinterest. YES!

The project looked like this:
and was originally pinned by a Pinterest follower like me. The project calls for using fabric and ModPodge to change the look of just the drawers in a dresser, chest of drawers, or whatever.
Well, I bought ModPodge and still haven't figured out how to use it yet.
So I went looking for contact paper with a really cool pattern instead.
I didn't find any that I really liked for Jenny's room, so I went with white.
It was really cheap and I got tons of it from Lowe's for 3 bucks.
Then I covered each drawer with stickers. They're easily removed if Jenny decides she'd like to have something other than princesses, fairies, and mermaids on her dresser.

Couple of things to remember or to know should you ever decide to do this one:
1. Make sure to wipe off all the surfaces. If you don't the paper won't stick right and you'll have to use clear tape to fix it.
2. Take your time, especially with the corners because they are a pain. There really isn't a right way to do them, so just figure it out as you go - cut and fold - that's about all the advice I can give you.
3. If you double layer the white paper (especially if the under-color is dark) you can create some really cool shadows.

So after making this wonderful change, I tried out the hardware I'd also purchased at Lowe's. Guess what? It didn't fit. The space between the two holes was custom and no standard handle was going to replace it. So Jenny picked out a knob and we put two in each drawer. It worked out great and I think it looks adorable.

Note to self: take old hardware to the store with you when you're going to replace it. This will save you a trip and time.

Thursday, April 19, 2012

Pinterest Conquest #1

So I'm in love with Pinterest - I can't help it. So much knowledge in one place and I don't even have to go far to look for it. YES!

I decided to start blogging about the things we've done from Pinterest, which I find funny since most of the stuff on Pinterest comes from other people's blogs. Where possible I will include pictures. That way, you can repin, my comments on a pin that was repinned. Go figure.

The first thing we attempted was what was touted as "Melt in Your Mouth Chicken" from Food.com.
The recipe sounded absolutely simple: 4 Chicken Breasts, 1/2 c parmesan cheese,1 c mayo, 1 tsp garlic powder, 1 1/2 tsp seasoning salt 1/2 tsp pepper,spread mix over chicken breasts, bake at 375 45 mins

Now the 45 minutes seemed a bit excessive to me, so I simply cooked it until the meat thermometer said it was done. This is a mistake! Cook it the full 45 minutes and you'll be rewarded with the wonderful crispy parmesan cheese coating that is pictured above. The chicken will not dry out.

Also, there seemed to me to be a serious lack of salt in this dish, so I tossed a bit of salt on the chicken before covering them with the mayo-cheese-spice spread. This is also a mistake - there is plenty of salt in the parmesan cheese already, so don't add any more.

I made mashed potatoes to go along with this. This was a great idea, especially since I'd slightly over-salted the chicken (I still liked it, Tim ate it, but commented that I might leave it out next time).

First, this allowed a wonderful blanace to the parmesan - it's so strong that the mashed potatoes really complimented it. I don't recommend anything like mac & cheese or stuffing because of the flavor fight, nor do I suggest you serve this next to rice or pasta - the consistency of the chicken was so perfect that I think you'd have texture issues with rice or pasta.

Second, the leftovers of this chicken were phenomenal. I stored it with the potatoes on the bottom and the chicken on top. This turned out to be great - the potatoes pulled just the right amount of salt out of the chicken and made it so yummy I didn't let Tim have any of the leftovers.

I will be making this again.

Pinterest Success!